Discover innovation with Adobbe Lightweight Thermoacoustic, the solution that completely transforms the installation of thermal insulation and light decorative cladding in a single step.
1. Prepare the surface
Before starting to insulate a building, the surface must be prepared. In this process, the facade is checked, imperfections and unevenness are repaired so that they do not exceed one centimeter, bad paintings are eliminated, etc. In this way, the subsequent steps will be well fixed.
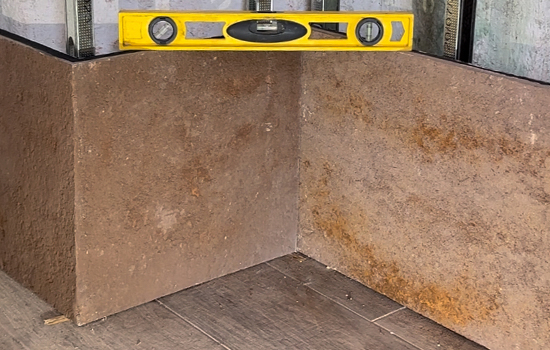
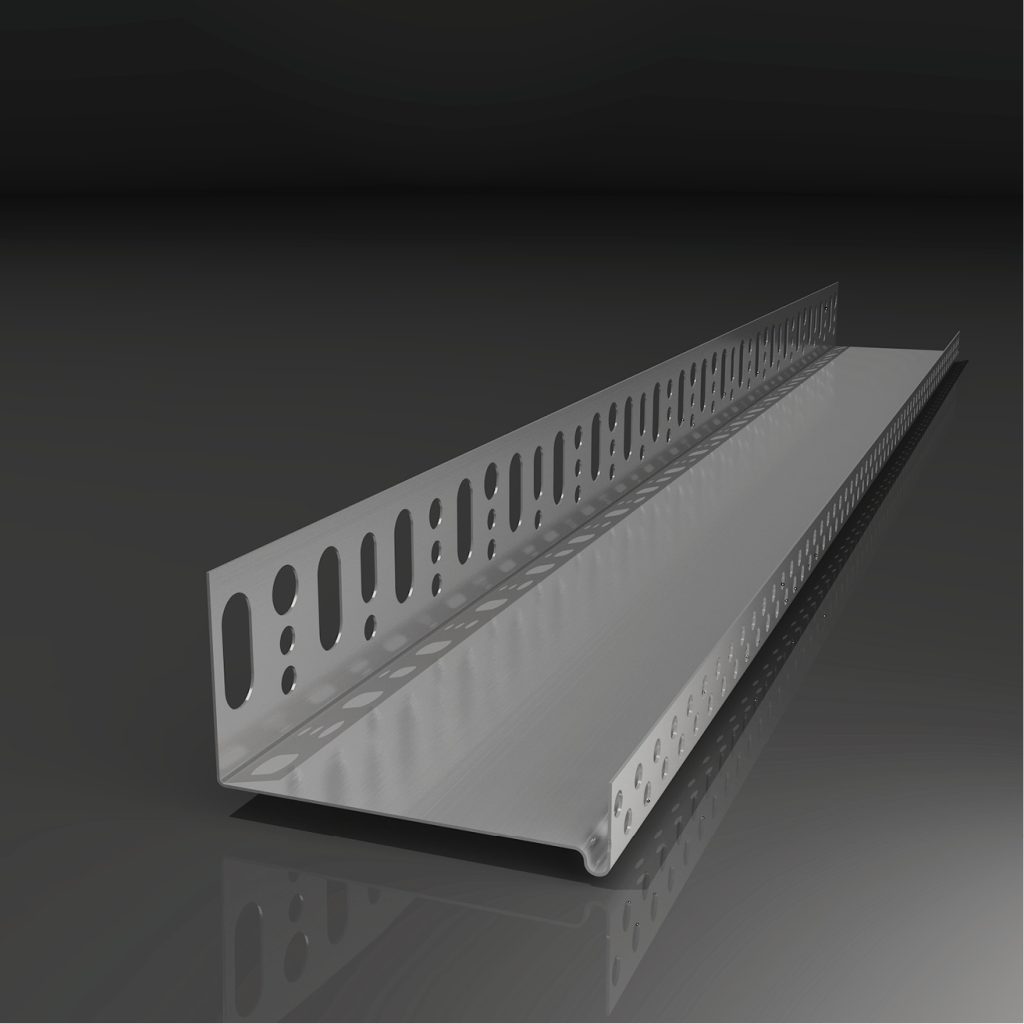
2. Profiles and starting level
The initial phase involves the review of starting profiles such as reinforcement strips, where they are examined in detail to ensure their correct functioning. Subsequently, the surface is carefully leveled, making sure to correct any unevenness. This meticulous process lays the essential foundation for insulation, ensuring optimum results.
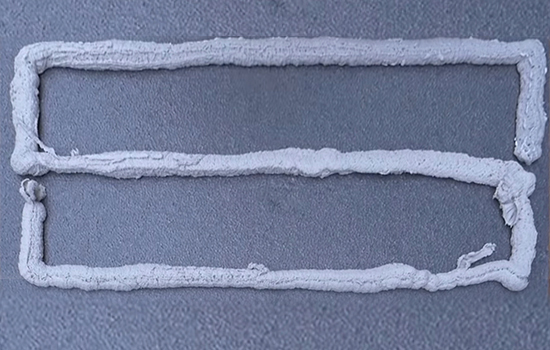
3. Application of glue mortar, polyurethane or silicone.
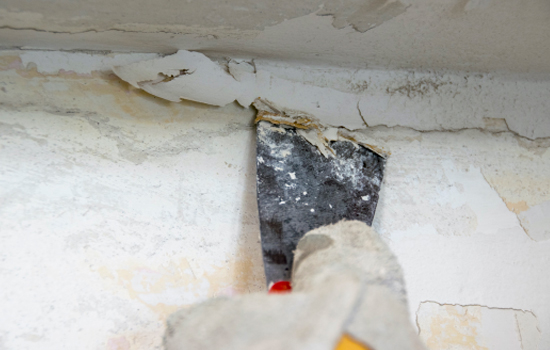
Place the insulating panels using the right amount of the appropriate or selected adhesive. This adhesion mortar or polyurethane plays a crucial role, guaranteeing a solid fixation of the boards and ensuring optimal installation results.
4. Placement of corner posts
It performs the placement of special pieces, such as corners or window edges, incorporating thermal insulation that contributes to restore the uniformity of the whole. These elements ensure an integral and efficient finish in terms of design.
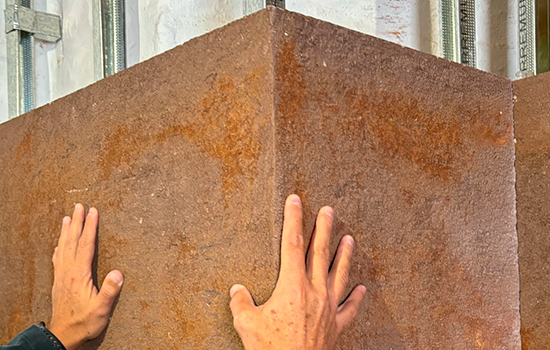
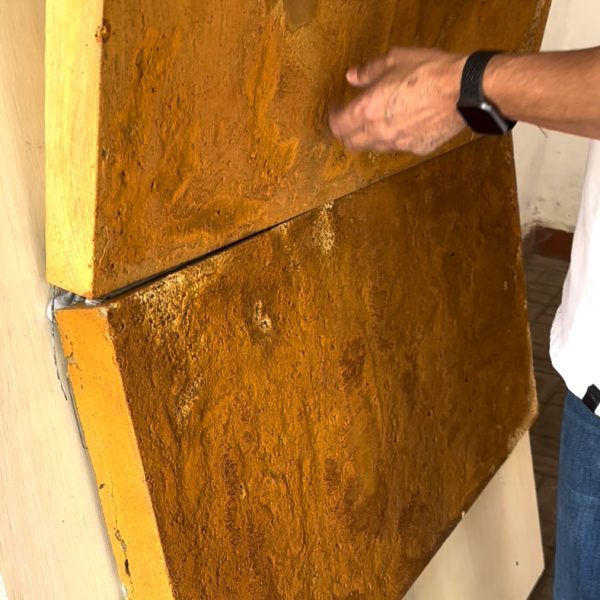
5. Installation of thermo-acoustic panels
Apply the thermo-acoustic panels to the wall, exerting a controlled pressure that allows for leveling between them. These boards have a certain flexibility, which makes it possible to adjust them by pressure to achieve a proper installation. This step is essential to ensure accurate placement, uniform leveling and a ready finish.
Pressure application ensures that the products are effectively fixed, providing an optimum result in terms of performance and aesthetics.
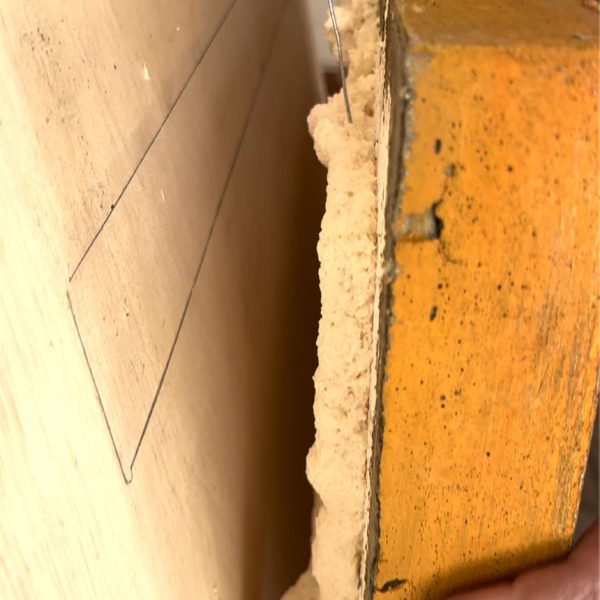
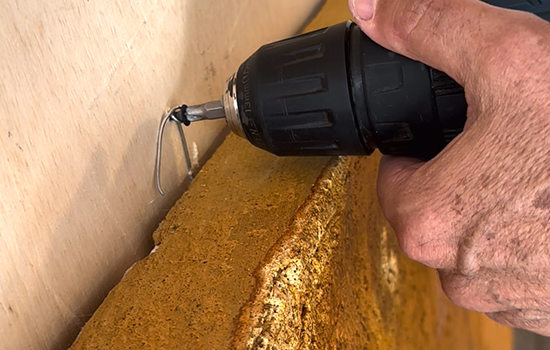
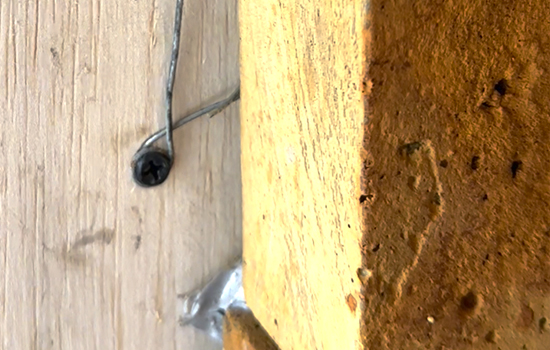
6. Anchoring
Our Thermoacoustic Veneer includes several copper or galvanized wires integrated into the mix, providing a reinforcement for the mechanical fixing of the board.
We recommend placing a screw in the wall to secure the wire fastening, thus guaranteeing a robust and durable installation.
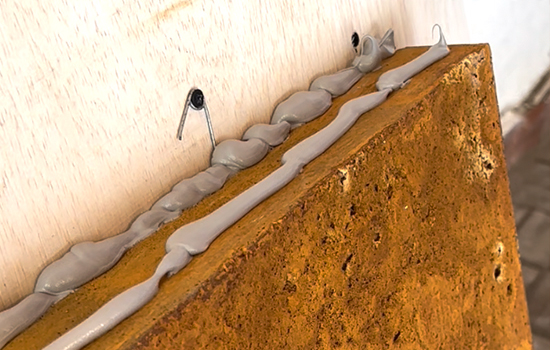
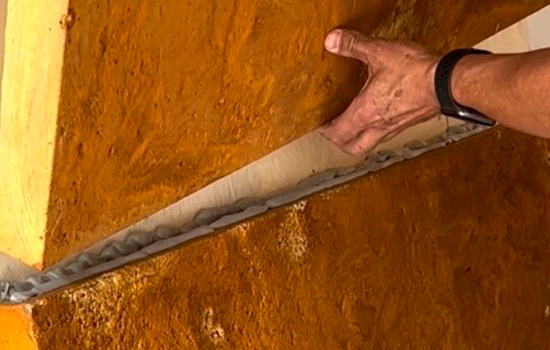
7. Application of silicone on joints
Apply silicone to the joints to achieve an effective seal. This step is essential to prevent leaks, ensure a waterproof barrier and eliminate thermal bridging.
This action contributes significantly to the durability and efficiency of the system, ensuring optimum performance over time.
Thanks to the quick and easy installation, you will be able to start enjoying your new decoration much sooner with Adobbe.
Our stone is designed to offer the opportunity to easily install it yourself. What used to take a mason days to complete, today only takes hours with Adobbe.